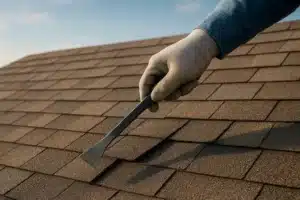
If you’ve ever looked up at your roof and wondered what all those layers actually do, you’re not alone. Most homeowners don’t think about their roof until something goes wrong—a leak appears on the ceiling, shingles go missing after a storm, or a gutter overflows. But understanding the basic anatomy of your roof is the best way to catch problems early and avoid costly water damage and structural rot.
Your roof is far more complex than just the shingles you see from the street. It’s a layered system of materials working together to shed water, protect your home’s structure, regulate temperature, and withstand weather. When one component fails, the entire system is compromised. In this guide, we’ll walk you through every major part of your roof, explain what it does, and show you what happens when it breaks down.
Whether you’re dealing with storm damage, planning a replacement, or just want to be a more informed homeowner, this guide will give you the vocabulary and knowledge to talk confidently with a roofing contractor and spot problems before they become emergencies.
The Shingles: Your Roof’s First Line of Defense
The shingles are what you see—and they’re arguably the most important component of your entire roof system. These overlapping pieces of material (typically made from asphalt, fiberglass, wood, or slate) are designed to shed water, absorb impact, and provide the aesthetic character of your home.
How shingles work
Modern residential shingles are typically three-tab or architectural. Three-tab shingles are lighter and more affordable. Architectural shingles (also called laminated or dimensional shingles) have a thicker, layered appearance that mimics the look of wood or slate while offering better durability and impact resistance. Both types are made from a fiberglass mat coated with asphalt and embedded with mineral granules.
Those granules aren’t just for color. They protect the asphalt from ultraviolet (UV) rays, which break down the material over time. They also provide traction and help shed water by creating a slightly rough surface.
What can go wrong
Shingles age, fade, and fail in predictable patterns. Early signs include:
- Missing granules. If you see dark spots on shingles or a buildup of granules in your gutters, the protective layer is wearing away. This accelerates aging.
- Curling or cupping. The edges of shingles may lift or curl upward, especially on older roofs or those exposed to extreme heat. This allows water to get underneath.
- Missing or torn shingles. High winds, hail, or fallen branches tear shingles. Even one missing shingle creates an opening for water to enter the layers below.
- Blistering or buckling. Shingles may bubble or wrinkle if moisture is trapped beneath them or if the roof deck has shifted. This is a sign of deeper problems.
- Discoloration or algae growth. Dark streaks or patches (usually on north-facing slopes) are often algae, which holds moisture and accelerates degradation.
Most asphalt shingles last 15–20 years. High-quality architectural shingles back by manufacturer warranties can last 25–30 years or more if properly installed and maintained.
What to do about it
If you spot one or two missing shingles or isolated damage, a localized repair may be all you need. However, if granule loss is widespread, curling is visible from the ground, or you’re seeing multiple problem areas, your roof is likely near the end of its lifespan. A professional roof inspection can determine whether repair or replacement is the right call.
The Underlayment: The Hidden Barrier Against Water Getting In
Directly beneath your shingles lies the underlayment—a water-resistant layer that acts as a secondary barrier between the shingles and the roof deck. Think of it as a safety net that catches water that sneaks past the shingles, especially during driving rain or ice dam situations.
How underlayment works
Underlayment is typically made from felt, synthetic polymer, or rubberized asphalt. Older homes often have felt (sometimes called tar paper), which is asphalt-saturated paper that’s relatively affordable but requires more frequent replacement. Modern homes increasingly use synthetic underlayment or ice-and-water shield, which are more durable and provide better protection in wet climates or areas prone to ice dams.
The material is laid in overlapping rows starting at the eaves and working upward toward the ridge. This overlap directs water downward and outward, preventing it from pooling or flowing back into the home.
What can go wrong
Because underlayment is hidden, you’ll never see it fail directly—but you’ll definitely feel the consequences:
- Wrinkles and buckling. If underlayment is installed too loosely or if moisture gets trapped between it and the deck, it can bubble and wrinkle. This compromises its water-shedding ability.
- Tears or punctures. During installation, underlayment can be torn by nails, debris, or sharp deck edges. It can also be damaged during roof repairs if not handled carefully.
- Deterioration from exposure. If underlayment is left exposed to sun and weather for an extended period (during a re-roofing project that takes too long), it degrades faster.
- Ice dam failures. Standard underlayment doesn’t stop water from backing up under shingles during ice dams. This is why ice-and-water shield (a thicker, stickier variant) is critical in northern climates.
What to do about it
You can’t inspect or repair underlayment yourself without removing shingles. However, if you’re seeing water stains on your ceiling or attic, and the shingles look intact, underlayment failure is a likely culprit. A professional roofer can assess this during an inspection. If your roof is being replaced, insist on high-quality underlayment appropriate for your climate—it’s one of the most cost-effective insurance policies you can buy.
The Roof Deck: The Structural Foundation
The roof deck (also called the sheathing) is the structural layer that holds everything together. It’s typically made from plywood or oriented-strand board (OSB) and is nailed to the roof trusses or rafters. The deck provides a solid surface for nailing shingles, underlayment, and other components, and it’s the first line of defense against structural damage from water getting in.
How the roof deck works
The deck is the “platform” of your roof. It spans the trusses and distributes the weight of roofing materials, snow, wind, and any foot traffic (like maintenance workers). It also provides attachment points for all the layers above and helps stiffen the overall structure of your home.
What can go wrong
The roof deck’s worst enemy is moisture. When water gets underneath shingles and underlayment and sits on the deck, it causes:
- Rot. Wood absorbs moisture and begins to decay, becoming soft and crumbly. Rotted decking loses its structural strength and can sag or collapse under snow load.
- Mold and mildew. Damp conditions encourage fungal growth, which further breaks down wood fibers.
- Nail pops. As wood expands and contracts with moisture changes, nails can back out of the deck, creating small gaps that allow water to penetrate further.
- Buckling or warping. Moisture causes wood to swell; as it dries, it shrinks unevenly, creating waves or buckling visible under the shingles.
The most common trigger for roof deck problems is an unrepaired leak that persists for months or years. By the time a water stain appears inside your home, the deck may already be significantly compromised.
What to do about it
Rotted decking must be replaced. This is why it’s critical to act quickly when you spot a leak—even a small one that seems harmless can become an expensive problem if left untreated. During a roof replacement, a contractor will photograph all areas of bare decking and identify any rot before charging you for replacement. This prevents surprise costs and ensures the new roof is installed on a solid foundation.
If you’re selling your home or having an inspection, be prepared that aged or damaged decking is a common reason for replacement quotes. It’s not optional—it’s structural.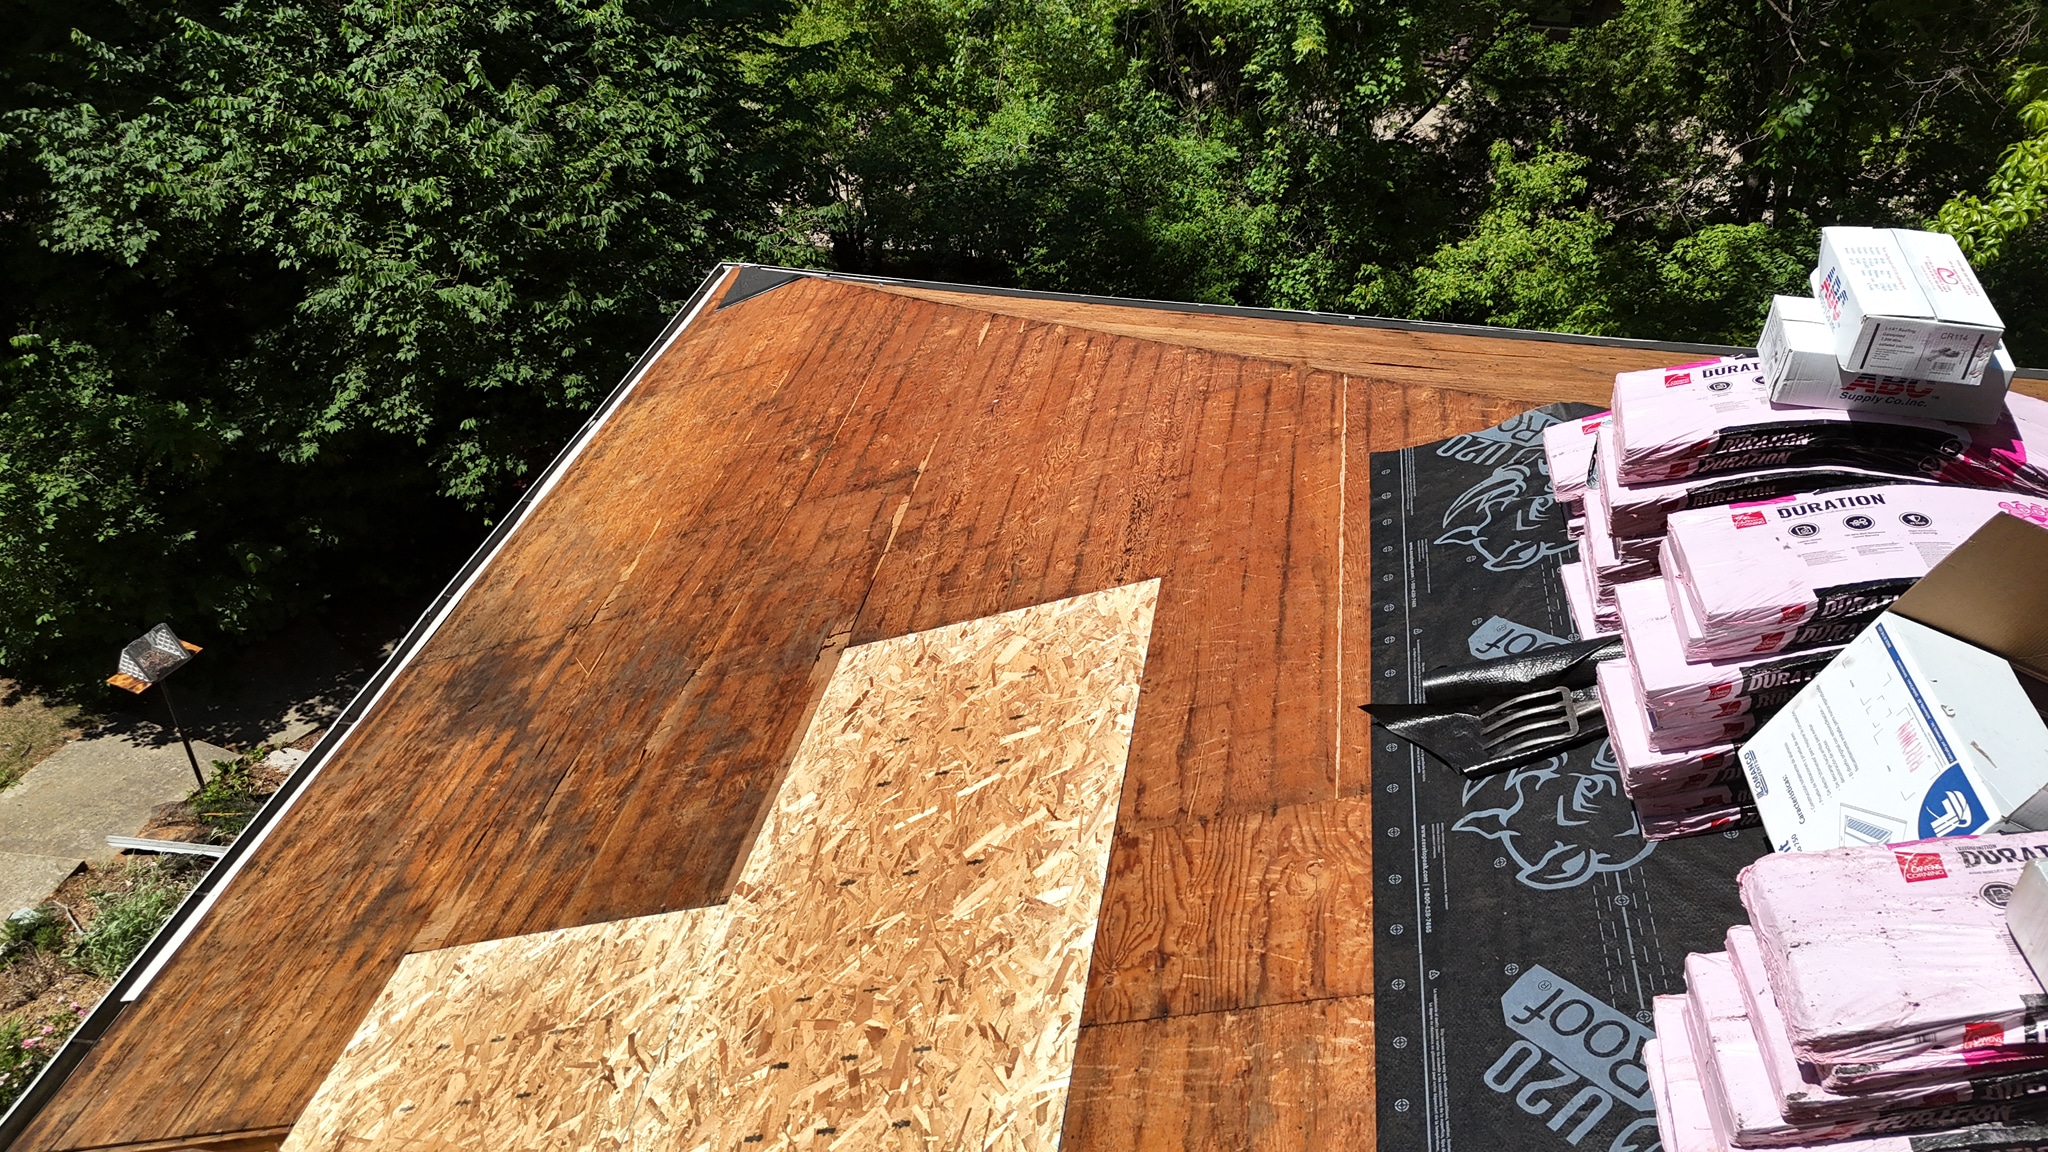
Flashing: The Intersection Seal
Flashing is sheet metal (usually aluminum or galvanized steel) installed wherever the roof plane intersects with a vertical surface or penetration—around chimneys, vents, skylights, dormers, and where the roof meets the walls of upper-story additions. Flashing’s job is simple but critical: direct water away from those vulnerable seams and prevent it from running down into the walls or through the roof structure.
How flashing works
Flashing is bent and shaped to fit the specific area it’s protecting. For example, chimney flashing has four pieces: base flashing that slides under the shingles on the uphill side, a saddle or cricket that diverts water around the back, and step flashing that overlaps shingles on the sides. Each piece is overlapped so that water flows over and away from the vulnerable joint.
Flashing is sealed with roofing cement or caulk to prevent water from seeping into the gaps. Many modern installations also use self-adhering flashing tape to supplement traditional sealed flashing.
What can go wrong
Flashing is one of the first components to fail, often because it’s exposed to more movement and temperature cycling than the main roof surface. Common problems include:
- Corrosion and rust. Over time, metal flashing corrodes, especially if it’s installed incorrectly (for example, incompatible metals that create galvanic corrosion) or if sealant breaks down.
- Separation from the roof. Flashing can pull away from shingles and the structure it’s protecting, creating gaps that allow water to seep in.
- Failed sealant. The caulk or cement that seals flashing joints dries out and cracks, allowing water underneath.
- Improper installation. If flashing isn’t overlapped correctly or if it’s installed after shingles (rather than with shingles), water can flow behind it instead of over it.
- Physical damage. Flashing can dent, bend, or be damaged by branch impact, foot traffic, or contractor mistakes during installation.
Flashing failures are a common cause of interior water stains, especially around chimneys and skylights. Because the water damage appears in that specific area, homeowners sometimes assume the shingles there are the problem when the real culprit is failed flashing.
What to do about it
If you spot rust, separation, or gaps in flashing, or if you’re seeing water stains on interior walls near a chimney or vent, have a professional inspect it immediately. Small flashing repairs can be done without a full roof replacement. However, if flashing is severely corroded or widespread, replacement is necessary. Good flashing is cheap insurance compared to the cost of water damage and structural rot.
The Soffit and Fascia: Protecting the Eaves
The soffit is the underside of the roof overhang (the soffit is the horizontal area under the eaves; look up at the underside of a gutter and you’re looking at the soffit). The fascia is the vertical board running along the edge of the roof where the gutters attach. Both protect the ends of the roof deck and the top of the walls from weather and pests.
How soffit and fascia work
Soffit and fascia are typically made from aluminum, vinyl, or wood. They serve multiple purposes:
- They close off the open space between the roof deck and the wall, preventing birds, bats, and pests from nesting in the attic.
- They direct water (especially from the gutters) away from the walls.
- They provide attachment points for gutters, vents, and exterior trim.
- They contribute to the finished appearance of your home’s exterior.
The soffit often has small perforations or vents that allow attic air to circulate, which is critical for preventing moisture buildup and extending the life of the roof deck and insulation.
What can go wrong
Soffit and fascia fail when they’re not maintained or when water damage occurs:
- Rotted wood. Wooden soffit and fascia absorb moisture and rot over time, especially if gutters are clogged or overflowing.
- Dented or damaged aluminum or vinyl. Physical impact, ice dams, or debris can dent or crack soffit and fascia.
- Clogged or blocked vents. If soffit vents become blocked by insulation, dirt, or pest nests, attic ventilation fails, leading to moisture buildup and premature roof failure.
- Separation from the structure. Soffit and fascia can pull away from the roof edge due to wood movement, improper fastening, or water damage to the underlying structure.
- Paint peeling or staining. This indicates moisture problems or UV damage.
When soffit and fascia fail, the consequences extend beyond appearance. Rotted soffit can allow water to penetrate into the roof structure and walls. Blocked vents reduce attic air circulation, causing heat and moisture to accumulate, which shortens the life of your shingles and can encourage mold.
What to do about it
During a roof inspection, a professional should assess the condition of soffit and fascia and check that soffit vents are clear. If you notice rotted wood, significant denting, or peeling paint, plan for repair or replacement. Minor issues can sometimes be addressed without a full roof replacement, but severely damaged soffit and fascia usually need to be replaced when the roof is done.
Gutters and Downspouts: The Water Management System
Gutters and downspouts are the unsung heroes of roof protection. Their job is to catch water flowing off the shingles and direct it away from your home’s foundation, walls, and landscape. Without them, water would pour straight down the exterior, saturating the soil around the foundation and potentially causing basement leaks, erosion, and structural problems.
How gutters and downspouts work
Gutters are channels (typically aluminum, vinyl, or copper) installed along the eaves. Water flows into them from the roof. Downspouts are vertical or angled pipes that carry water from the gutters down the side of the house and away from the foundation—ideally 4–6 feet away.
The pitch of the gutter should be slight (about 1/8 inch per 10 feet) so water flows toward downspouts rather than pooling. Gutters are fastened with hangers or brackets spaced 24–36 inches apart.
What can go wrong
Gutters fail through a combination of debris accumulation, age, and weather exposure:
- Clogs and overflow. Leaves, twigs, and debris pile up in gutters, especially in fall. When gutters are full, water overflows the sides, running down the walls and saturating the soil around the foundation. This is one of the most common causes of basement leaks.
- Rust and corrosion. Metal gutters rust over time, especially if they’re galvanized steel rather than aluminum. Rust perforation allows water to drip directly onto the fascia and soffit below.
- Sagging and separation. Gutters filled with water and debris are heavy. If hangers are corroded or fasteners are loose, gutters sag, creating valleys where water pools and rots the fascia. Sagging gutters also separate from the roof edge, allowing water to flow behind them.
- Seam leaks. Where gutter sections meet, sealant can fail, allowing water to seep through and drip behind the gutter.
- Improper slope or installation. If gutters are installed without proper pitch or if downspouts are missing or broken, water doesn’t drain properly.
- Damage from ice dams. In winter, ice can back up in gutters, causing water to seep under shingles and freeze behind the gutter, pulling it away from the fascia.
What to do about it
Gutter maintenance is preventive and affordable. Clean your gutters at least twice a year (spring and fall), or install gutter guards to reduce maintenance. If gutters are sagging, rusted, or leaking, they should be repaired or replaced. Full gutter replacement with seamless aluminum gutters matched to your home’s architecture is a common upgrade during re-roofing projects. The investment is worthwhile: gutters are far cheaper than repairing foundation problems, basement water damage, or rot in your home’s structure.
If you’re noticing overflow after heavy rain, foundation erosion, or basement dampness, gutter problems are often the culprit. A professional can inspect and recommend cleaning, repair, or replacement based on the severity.
The Ridge Vent and Roof Vents: Breathing Room for Your Attic
Proper attic ventilation is essential for roof longevity, and ridge vents and roof vents are the system that makes it work. A ridge vent runs along the peak of the roof (the ridge). Roof vents (sometimes called box vents or turtle vents) are individual penetrations lower on the roof. Together, they create air flow that pulls moisture out of the attic and reduces heat buildup, which extends the life of shingles and prevents ice dams.
How ridge vents and roof vents work
Hot, moist air naturally rises. Ridge vents at the peak allow that air to escape. Lower-positioned roof vents (on gable walls or lower slopes) allow fresh, cool air to enter. This continuous flow prevents moisture from accumulating, which can rot the roof deck and insulation, and it reduces attic temperature in summer, easing the load on air conditioning.
Ridge vents are continuous openings protected by a vent cap and shingles. Roof vents are box-shaped, often made from aluminum or plastic, with flapper doors that open and close with air pressure.
What can go wrong
Ventilation failures are often invisible until you see the consequences:
- Blocked or clogged vents. Insulation, dust, or pest nests can block roof vents, choking off air flow.
- Damaged vent caps or doors. The flapper doors on roof vents can rust, warp, or get stuck, preventing air from flowing freely.
- Deteriorated ridge vent shingles. The shingles covering the ridge vent can crack or separate, allowing water to seep in.
- Improper installation. If vents aren’t sealed or installed correctly, water can flow around them into the attic.
- Undersized or insufficient vents. Some attics don’t have enough ventilation capacity, so moisture still builds up even with vents present.
Poor ventilation accelerates shingle failure—shingles in a hot, humid attic degrade much faster than those with proper air circulation. It also increases the risk of ice dams in winter and mold growth year-round.
What to do about it
During a roof replacement, the contractor should assess ventilation and recommend upgrades if needed. If your attic feels hot in summer, you notice moisture or mold, or your shingles are aging prematurely, ventilation may be the issue. A professional inspection can identify blocked vents or insufficient air flow and recommend solutions—which might be as simple as cleaning out vents or as involved as adding additional vents or upgrading to a ridge vent system.
The Roof Trusses and Framing: The Skeleton
Beneath the roof deck, roof sheathing, and all the layers above, trusses and rafters form the structural frame that supports everything. These are large wooden beams (usually 2×6 or larger lumber) that span from the exterior walls to the peak of the roof.
How trusses and framing work
Trusses are prefabricated, triangulated wooden frames engineered to distribute weight efficiently. They’re nailed to the top plates of exterior walls and spaced 16–24 inches apart. This system is rigid, can span large distances without sagging, and provides a framework for attaching the roof deck and ceiling.
Rafters are an older style of roof framing where individual beams are cut and assembled on-site. Modern homes almost always use trusses, which are faster to install and more reliable.
What can go wrong
Structural failures are rare if the roof is properly maintained, but they can happen:
- Rot from prolonged water exposure. If a roof leak goes unrepaired for years, water can saturate trusses, leading to rot and loss of structural strength. In extreme cases, trusses can sag or fail under snow load.
- Insect damage. Termites and carpenter ants can tunnel through trusses, weakening them over time.
- Improper repairs or modifications. If someone cuts into a truss to run ductwork or wiring without proper engineering, it can compromise the frame’s integrity.
- Ice dam backup. Severe ice dams can push water up under the roof edge and into the attic, saturating trusses and insulation.
What to do about it
Structural problems are caught during professional inspections. If you’re having your roof replaced, the contractor will examine trusses and let you know if any are damaged. If you have a significant roof leak that’s been ongoing, ask the inspector to specifically check truss condition. Catching rot early, before structural integrity is compromised, is far cheaper than dealing with sagging or failed framing.
Common Signs Your Roof Needs Attention
Now that you understand the anatomy of your roof, here are the most important warning signs to watch for:
- Interior water stains or leaks. This is always a red flag. Even a small stain means water is getting past your roof system. Act quickly to prevent rot.
- Visible missing or damaged shingles. One or two can be repaired. Many suggest replacement.
- Granule loss in gutters. A little is normal. Significant amounts mean shingles are aging rapidly.
- Sagging roof line. This suggests structural stress, often from heavy snow, water damage, or deteriorated trusses. Call a professional immediately.
- Moss or algae growth. This holds moisture and accelerates shingle degradation.
- Gutter overflow after rain. Clean gutters first. If the problem persists, gutters may need repair or replacement.
- Rusted or separated flashing. This is visible from the ground around chimneys, vents, and skylights. It allows water to penetrate at these vulnerable intersections.
- Peeling soffit or fascia paint, or visible rot. This indicates moisture problems that will eventually affect the roof structure.
When to Call a Professional
You don’t need to climb on your roof or become an expert to protect it. A professional roof inspection—ideally free and without obligation—can identify problems before they become expensive. A good contractor will point out what’s failing and what’s still serviceable, walk you through your options, and help you prioritize repairs or plan for replacement.
If you’re in the St. Louis area and your roof needs evaluation, Edwards & Sons Roofing offers free inspections with no pressure or commitment. You’ll get honest guidance, transparent pricing, and a commitment to treating your home with the same care as their own. They’ve completed over 5,000 roofing projects across three generations, and they back their work with manufacturer warranties and guaranteed 24-hour callbacks.
The bottom line: your roof is a system of interdependent parts, each with a specific job. When one fails, the others are at risk. Understanding how your roof works helps you spot problems early and make informed decisions with a roofing professional. Regular maintenance—especially gutter cleaning and inspections after storms—is your best investment in protecting your home and avoiding costly water damage.